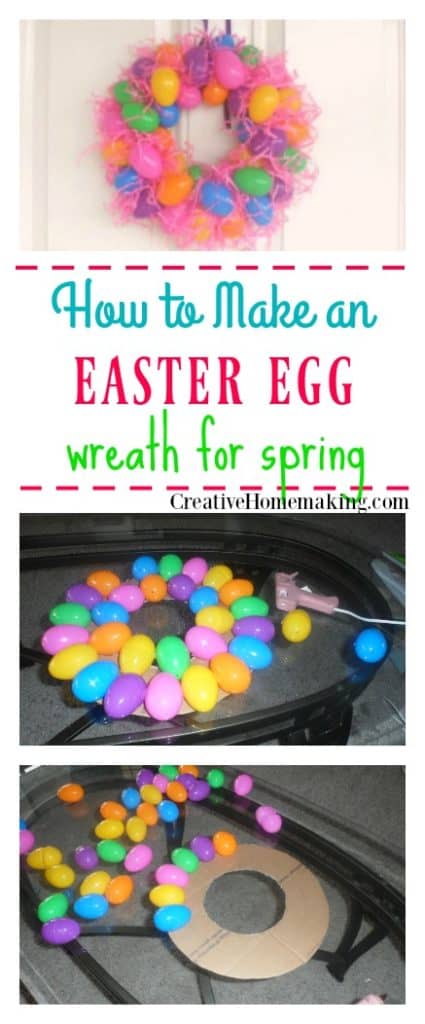
Plastic egg wreaths are so easy to make. If you are looking for an inexpensive, easy craft to do for Easter, then you should give this project a try. This wreath will look great on your front door.
This post may contain affiliate links.
Easter Egg Wreath
Supplied Needed:
- 42 plastic Easter eggs
- Hot glue gun
- Easter grass
- Cardboard for wreath base
- Ribbon
- Scissors
- Pencil
You may already have all the supplies on hand to make this easy Easter craft. If you do have to purchase the supplies, you can buy the eggs and Easter grass for about $3 at Walmart.
First you need to cut an approximately 12 inch circle out of a piece of cardboard. This will be the base of your wreath. Next cut a second circle from the middle of the first one, approximately 9 inches across.
While you are letting your glue gun heat up, set out all your plastic eggs and make sure they are all closed and ready to glue on the wreath.
Begin gluing the plastic eggs to the cardboard, making a circle of eggs around the outside edge of the cardboard. With a pencil I drew a line around the circle, between the two cut edges.
I placed the bases of the eggs on this line so that they would be evenly lined up around the circle. The edges of the eggs should be hanging off the edge of the cardboard (see photo).

When you are gluing the eggs, make sure to put a dot of glue both on the cardboard and where one egg is touching another egg. The hot glue works really well for this project. The glue hardens really fast. You can also peel the glue off the eggs if you get some in the wrong place.
Next make a second circle of eggs, around the inside of the cardboard circle. You will now have two rows of eggs.
When you get all the way around the circle with the eggs, you will probably end up with a space where another egg will not fit.
You can later cover up this space with Easter grass and/or a bow.
Now that you have the first layer of eggs completed, glue additional eggs on top of the first layer. These eggs don’t have to lined up, just glue them where you think they would look best.
When you run out of room for eggs, it’s time to start covering any gaps between the eggs with Easter grass.
Anywhere you can see cardboard between the eggs, add a couple of drops of hot glue and then press a few strands of Easter grass down between the eggs.
Do this between all the eggs, until all the holes are covered and you are happy with how the wreath looks.
If you are good at making bows, you can then make a pretty bow to finish off your wreath. I am not that talented, so I just wrapped a pretty piece of ribbon around one edge of the wreath and tied it in a bow to hang from my front door.
You can complete this easy project in about an hour. It would also be fun for children who are old enough to handle a glue gun.
Get together with a couple of friends and make them together. Experiment with different colors of Easter eggs and different colors of Easter grass.
Happy Spring!
Related Easter Ideas
- Glow in the Dark Easter Egg Hunt
- Colored Deviled Eggs
- Easy Easter Baskets by Age
- Peeps Pudding Cups
- Peeps Fruit Kabobs
- Magic Jelly Beans
- How to Make String Easter Eggs
- 4 Ideas for Hiding Easter Baskets
Follow my Easter Recipes & Crafts board on Pinterest.


The awesome thing about this is how cheap the supplies are. A giant bag of eggs is like, $2? And I know a bag of Easter basket grass is only $1 or even 50 cents if you get the cheap stuff. The most expensive part of the whole thing is probably the glue!