This post may contain affiliate links.
Canning cherry jelly is a simple way to enjoy fresh fruit all year long. You can preserve the sweet taste of cherries by cooking them with sugar and pectin, then sealing the jelly in jars that keep it safe and fresh for months.
This process doesn’t need fancy tools, just a few basic steps you can easily follow at home. When you make your own cherry jelly, you control the ingredients and get a tasty treat for yourself or to share.
If you love the idea of homemade jelly but don’t know where to start, this guide will walk you through everything you need to make cherry jelly that’s perfect every time.
Canning Expertise: Rachel Paxton is a certified Master Home Food Preserver with over 25 years of hands-on experience in safe home canning and food preservation.
Looking for more preserves? Browse all my Homemade Jam & Jelly Recipes here.
Want to try making your own jelly at home?
Get my free guide with 8 easy, beginner-friendly jelly recipes you can confidently make.

Step-By-Step Guide to Canning Cherry Jelly
You will start by getting your cherries ready, making sure they are clean and fresh.
Then, you’ll cook the cherries with sugar and pectin to make the jelly. Finally, cleaning and preparing your jars and tools carefully will keep your jelly safe to eat.
Related Recipe: Honeysuckle Jelly Canning Recipe: A Sweet and Floral Delight
Sterilizing Jars and Equipment
Use glass canning jars designed for canning. Wash them with hot, soapy water first. Rinse well to remove all soap.
Sterilize jars by boiling them in water for at least 10 minutes. You can also sterilize them by running them through a quick rinse cycle in the dishwasher.
Related Recipe: Canning Peach Jelly: A Beginner’s Guide
Do the same with lids and bands, but don’t boil the lids. Instead, soak them in hot, but not boiling, water. Use clean tongs to handle the jars and lids to keep everything sterile.
Cherry Jelly Canning Recipe
Ingredients
- 4 cups fresh cherries (about 4 pounds)
- 1/4 cup water
- 1 box (1.75 oz) fruit pectin (such as Sure-Jell)
- 5 cups granulated sugar
- 1 tablespoon lemon juice
Equipment
- Canning jars (sterilized), lids, and rings
- Large pot for boiling water bath
- Jelly strainer or fine mesh sieve (optional)
- Cherry pitter
- Large saucepan
- Ladle and canning funnel for filling jars
Prepare Jars and Lids:
Sterilize your jars and lids and keep them hot until ready to fill.
Extract Cherry Juice:
Pit the cherries with a cherry pitter. Place cherries in a large saucepan and add a small amount of water (about 1/4 cup).
Simmer gently for 10-15 minutes until cherries release juice.
Pour the mixture into a jelly bag or fine mesh strainer and let juice drip through for several hours or overnight. Avoid pressing the pulp to keep the jelly clear.
Related Recipe: Canning Blueberry Jelly Made Easy: A Guide for Beginners
Prepare Jelly Mixture:
Measure 4 cups of the cherry juice into a large saucepan. Stir in fruit pectin. Bring to a full rolling boil over high heat, stirring constantly.
Want to understand how jelly thickens and which type to use? Read my complete guide to pectin for jam and jelly making here.
Add Sugar and Boil:
Add all 5 cups of sugar at once. Stir to dissolve and return to a full rolling boil. Boil hard for exactly 1 minute, stirring constantly.
Related Recipe: Sweet & Simple Apple Jelly Recipe for Beginners
Test Jelly Consistency:
Remove from heat. Skim off any foam with a spoon. If desired, test jelly by placing a small amount on a cold plate; if it wrinkles when pushed with a finger, it’s ready.
Add Lemon Juice:
Stir in 1 tablespoon lemon juice.
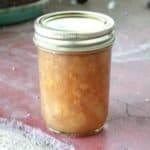
Fill Jars:
Using a ladle and funnel, fill hot sterilized jars with jelly, leaving 1/4 inch headspace.
You can easily measure the headspace with this inexpensive canning funnel. Wipe rims clean, place lids on jars, and screw on bands fingertip-tight.
Process in Boiling Water Bath:
Place jars in boiling water canner, making sure they are covered by at least 1-2 inches of water. Process for 10 minutes (adjust time for altitude if necessary). Remove jars and let cool undisturbed for 12-24 hours.
Check Seals and Store:
After cooling, check seals by pressing center of lids; they should not flex up and down.
Read: How to Test Canning Jar Seals
Follow my canning and preserving board on Pinterest.