This post may contain affiliate links.
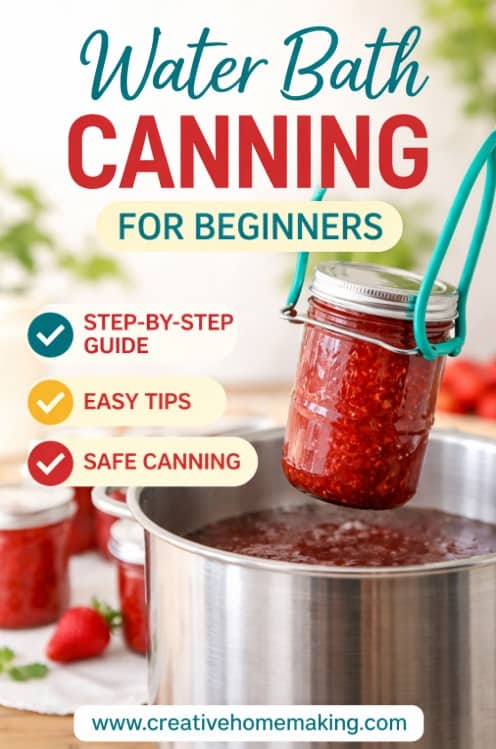
Water bath canning is one of the easiest ways to preserve food at home, and it’s the perfect place to start if you’re new to canning.
If you’ve ever wanted to make homemade jam, jelly, or pie filling and store it on your pantry shelf, this method is for you.
In this guide, I’ll walk you through exactly how water bath canning works, what equipment you need, and how to safely can your first batch.
What is Water Bath Canning?
Water bath canning is a method of preserving high-acid foods by processing jars in boiling water.
The heat:
Want to try making your own jelly at home?
Get my free guide with 8 easy, beginner-friendly jelly recipes you can confidently make.
- Kills bacteria
- Creates a vacuum seal
- Makes food shelf-stable
This method is used for foods like:
- Jam and jelly
- Fruit
- Pie filling
- Pickles
- Tomatoes (with added acid)
What Foods Can Be Water Bath Canned?
Water bath canning is only safe for high-acid foods.
Safe foods include:
- Most fruits
- Fruit jams and jellies
- Pickles and relishes
- Tomatoes (with lemon juice or citric acid)
Low-acid foods (like vegetables, meat, and soups) require a pressure canner, not a water bath.
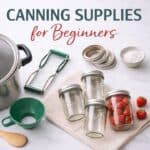
Equipment You Need for Water Bath Canning
You don’t need anything complicated to get started.
Basic equipment:
- Large pot or water bath canner
- Canning jars (mason jars)
- Lids and rings
- Jar lifter
- Canning funnel
- Ladle
You may already have most of these in your kitchen.
How Water Bath Canning Works
The process is simple:
- Start with clean jars—learn how to properly sterilize canning jars here
- Fill jars with hot food
- Place lids and rings on jars
- Submerge jars in boiling water
- Process for a set amount of time
- Remove and let cool
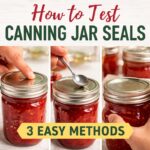
As the jars cool, they seal and become shelf-stable. Learn how to test the jar seals here.
Step-by-Step Water Bath Canning Process
Some recipes use raw pack and others use hot pack—learn the difference here.
Step 1: Prepare Your Jars
Wash jars, lids, and rings in hot soapy water or run them through the dishwasher.
Keep jars hot until you’re ready to use them.
Step 2: Prepare Your Recipe
Follow a tested recipe (like jam, jelly, or pie filling).
Make sure:
- Ingredients are measured correctly
- Cooking times are followed
This ensures your food will set and preserve properly.
Step 3: Fill the Jars
- Use a canning funnel to fill jars (you can measure the headspace too with this one)
- Leave the recommended headspace (usually 1/4 inch for jelly)
Remove air bubbles if needed.
Step 4: Wipe the Rims
Wipe jar rims with a damp cloth to remove any residue.
This helps ensure a proper seal.
Step 5: Add Lids and Rings
- Place lids on jars
- Screw on rings until finger tight (not too tight)
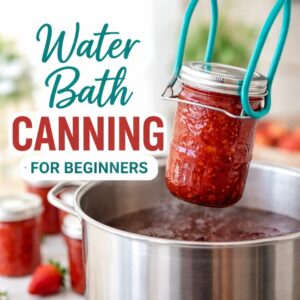
Step 6: Process in Boiling Water
- Place jars in boiling water canner
- Make sure water covers jars by 1–2 inches
- Bring to a rolling boil
- Process for the time specified in your recipe
Step 7: Cool and Seal
Remove jars and place on a towel.
Let them sit undisturbed for 12–24 hours.
You’ll hear the lids “pop” as they seal.
How to Know if Your Jars Sealed
After jars cool:
- Press the center of each lid
- If it doesn’t move → sealed
- If it pops → not sealed
Unsealed jars should be refrigerated and used soon.
Ingredients & Basics
Common Water Bath Canning Mistakes
Not processing long enough
- Incorrect headspace
- Not wiping rims
- Using the wrong type of recipe
- Skipping the boiling step
Following a tested recipe helps you avoid most problems.
Do You Need a Water Bath Canner?
You don’t have to buy a special canner.
You can use:
- A large stockpot
- A rack on the bottom (to keep jars off direct heat)
As long as:
- Jars are fully submerged
- Water can boil properly
How Long Does Home Canned Food Last?
Properly sealed jars can last:
- 1–2 years in a cool, dark pantry
For best quality:
- Store away from heat and light
- Check seals before using
Frequently Asked Questions
Is water bath canning safe?
Yes, when used for high-acid foods and tested recipes, water bath canning is completely safe.
Can I reuse canning lids?
No, lids are designed for one-time use to ensure a proper seal.
Rings can be reused.
Why didn’t my jars seal?
This can happen if:
- Rims weren’t clean
- Lids weren’t applied correctly
- Processing time was too short
What should I do if something goes wrong?
If your jelly didn’t set or you had trouble with a recipe, you can read my full guide on what to do if your jelly doesn’t set.
Beginner Recipes to Try
If you’re ready to get started, here are some easy recipes:
You can also browse all of my canning recipes here for more ideas.
Follow my canning and preserving board on Pinterest.