This post may contain affiliate links.
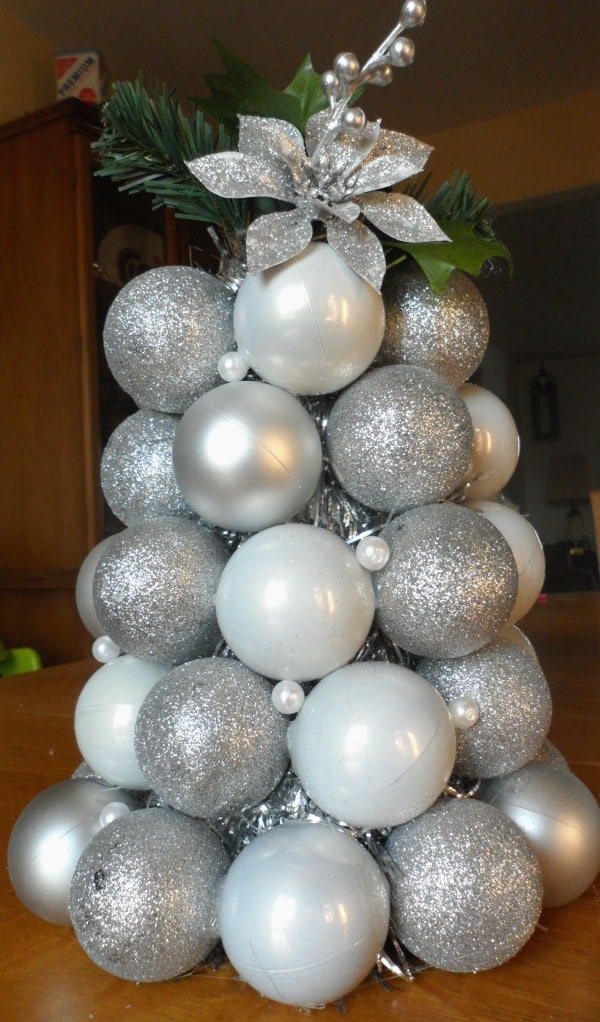
If you are looking for an easy craft to make to decorate your home for the holidays, then consider making this festive ornament tree made from Christmas ball ornaments.
This ornament tree is a beautiful DIY holiday decoration that would make a great addition to any holiday table.
You can buy all the supplies you need from any local craft store. The cost of this project is approximately $10, and you can complete the project in about an hour.
Want to try making your own jelly at home?
Get my free guide with 8 easy, beginner-friendly jelly recipes you can confidently make.
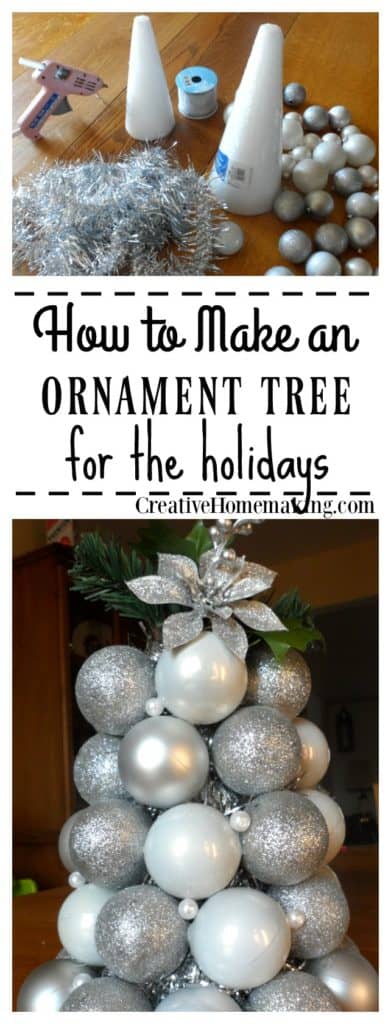
Supplies Needed:
- Styrofoam cone
- Ball ornaments (approximately 30 medium)
- Silver tinsel
- Hot glue gun
- Ribbon (optional)
- Holiday greenery (optional)
You will need several boxes of ball ornaments to create this ornament tree. Medium ornaments work best. It is recommended to use shatterproof ornaments for this project so that the finished project won’t break easily when you put it away to store it.
You can buy shatterproof ornaments very inexpensively at the Dollar Store. For this project only silver ornaments were used, but you could use ornaments of any color. Shiny metallic ornaments and glittered ornaments complement each other well.
Directions:
The silver tinsel will be used to cover the styrofoam cone so that you cannot see the cone through the ornaments. Wind the tinsel around the tree and glue the ends in place at the top and bottom of the tree.
Cut off any excess tinsel. The cone should be completely covered, you shouldn’t be able to see any white styrofoam through the tinsel.
Next remove all the metal ends of the ornaments. You will not need that part of the ornament for this project.
Beginning at the base of the styrofoam cone, gently press the open ends of the ornaments into the cone. This will create an indentation to put hot glue into.
Place a dab of hot glue in the holes that you make and then press each ornament into place. You may need to hold the ornament for several seconds until the glue holds.
Continue gluing ornaments around the base of the cone. Next start the second row of ornaments, directly above the first row, slightly staggering the ornaments along the ornaments in the first row (you don’t want the ornaments directly above each other).
Alternate ornament colors, if desired. As you complete a row, place hot glue in between the ornaments to help hold them together and press together for a minute or so to help get the glue to take hold.
Finishing Touches
Continue gluing on the ball ornaments until you reach the top of the styrofoam cone. You will need approximately 30 ornaments, depending on the size of the cone.
Check the entire tree and look for places where more hot glue may be necessary to hold the ornaments in place. Look to make sure none of the ornaments have popped out of place.
If desired, you can top off the tree with a sprig of holiday greenery or a decorative bow. You can also hot glue pearl beads in between the ornaments, if desired (the pearl beads look really pretty with silver ornaments).
Consider creating several ornament trees in a variety of heights to make a festive table centerpiece for your holiday table.
Follow my Christmas board on Pinterest.