This post may contain affiliate links.
Growing rhododendrons from cuttings is a rewarding way to expand your garden with these beautiful plants. To successfully grow rhododendrons from cuttings, you need to take healthy cuttings, use the right rooting hormone, and provide a suitable environment for them to thrive. With the right steps, you can create new plants that will flourish and add color to your outdoor space.
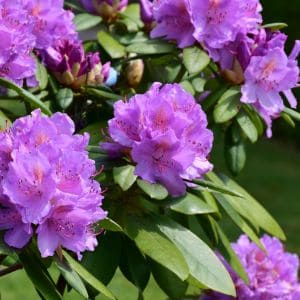
Starting with healthy cuttings is key. Look for young, green stems that are not too woody. This will help ensure that your cuttings have the best chance of developing roots. Proper care and attention during the rooting process can lead to vibrant rhododendrons in your garden.
Caring for your cuttings doesn’t have to be complicated. Keep them in a moist environment and provide them with indirect sunlight. This will create the perfect conditions for root growth. Once you get the hang of it, you might find that propagating rhododendrons becomes a favorite gardening project.
Related Article: How to Prune a Rhododendron: A Step-by-Step Guide

Essential Steps to Grow Rhododendrons from Cuttings
Growing rhododendrons from cuttings can be a rewarding experience. You will need to select healthy cuttings, prepare them properly, choose effective rooting methods, and finally transplant them into the soil.
Want to try making your own jelly at home?
Get my free guide with 8 easy, beginner-friendly jelly recipes you can confidently make.
Related Article: Planting Rhododendrons in Pots: A Simple Guide for Beautiful Blooms
Selecting Healthy Rhododendron Cuttings
Start by choosing the right cuttings. Look for stems that are healthy and vibrant. The best cuttings are typically taken from non-flowering stems.
Make sure the stems are about 4 to 6 inches long. Look for cuttings that have at least two or three sets of leaves. Avoid any stems with signs of disease or damage.
It’s best to take cuttings in the spring or early summer when the plant is growing actively. The fresh growth has a higher chance of rooting successfully.
Related Article: When to Cut Back Azaleas for Optimal Growth and Blooming
Preparing Cuttings for Rooting
Once you have your cuttings, it’s time to prepare them. Remove the lower leaves, leaving just a couple at the top. This helps focus the plant’s energy on developing roots.
You can treat the cut ends with rooting hormone. This boosts your chances of success. Dip the cut end into the hormone powder and tap off the extra.
Next, get your soil ready. Use a mix that drains well, like peat and perlite. Fill small pots or trays with this mix and moisten it lightly before planting your cuttings.
Related Article: How to Grow Azaleas in Containers Easily for Beautiful Blooms
Rooting Methods for Success
There are a few methods to root your cuttings. One popular way is to place them in water. Just put the cut ends in a glass of water and change the water regularly.
Another effective method is planting them directly in the soil. Make a small hole in your prepared mix and place the cutting in it. Gently firm the soil around the stem.
For both methods, cover the pots with a plastic bag or a clear container to keep humidity high. This helps the cuttings stay moist and encourages root growth.
Related Article: Companion Plants for Blueberries: Enhancing Growth and Flavor in Your Garden
Transplanting Rooted Cuttings
After a few weeks, check if your cuttings have rooted. Give them a gentle tug. If you feel resistance, they’re likely ready to be moved.
Be careful when transplanting. Use a small shovel to lift the cutting with its roots and some soil. Place it in a slightly larger pot with well-draining soil.
Water them thoroughly after transplanting. Keep them in a shady spot for a week to help them adjust. After that, they can gradually get more sunlight.
Related Article: Best Companion Plants for Azaleas to Brighten Your Garden Naturally
Tips for Thriving Rhododendron Plants
To help your rhododendrons grow strong and healthy, focus on light, temperature, watering, humidity, and soil. Each of these factors plays a key role in the plant’s development.
Providing Optimal Light and Temperature
Rhododendrons prefer dappled sunlight. They thrive best when protected from harsh afternoon sun. A location with morning sun and afternoon shade is ideal. If growing indoors, place them near a bright window, but avoid direct sunlight.
Related Article: How to Grow Azaleas from Cuttings: Easy Steps for Beautiful Blooms
Temperature is also important. Rhododendrons favor cool temperatures, ideally between 60°F and 70°F (15°C to 21°C). In colder areas, ensure they are sheltered from freezing winds. During winter, protect your plants from extreme cold by covering them or moving them to a warmer spot.
Watering and Humidity Care
Rhododendrons need consistent moisture, but they don’t like to sit in water. Water them deeply once a week. Check the top inch of the soil; if it feels dry, it’s time to water again.
Humidity is important too. If you live in a dry climate, mist your plants regularly or place a humidifier nearby. Rhododendrons thrive in humidity levels of 50% or higher. Using a pebble tray with water under your pot can help keep humidity up.
Choosing the Best Soil Mix
Use well-draining, acidic soil for your rhododendrons. A mix of potting soil, peat moss, and perlite works well. The soil should have a pH of 4.5 to 6.0. This acidity helps the plant absorb nutrients effectively.
To create the right mix, combine:
- 40% potting soil
- 30% peat moss
- 30% perlite
Make sure the pot has good drainage holes. This helps prevent root rot, which can be harmful to your plants. Regularly check the soil moisture to keep it balanced.
Follow my rhododendron board on Pinterest.