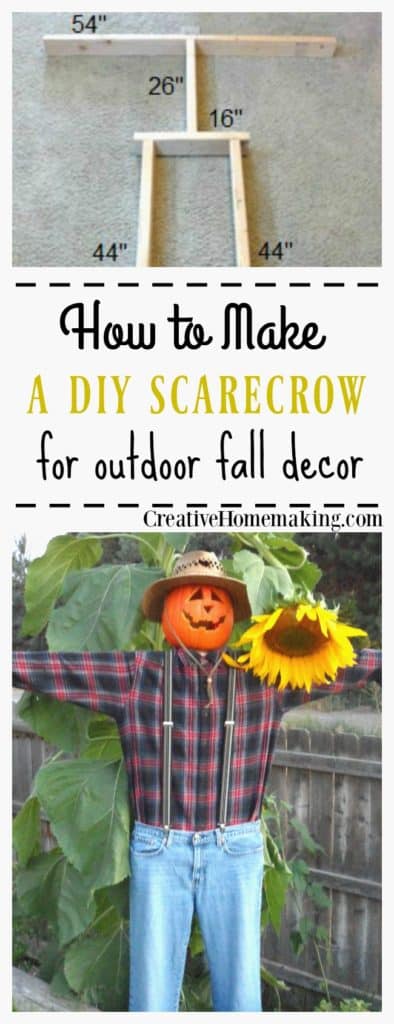
I have been wanting to make a scarecrow for years. The ones you buy at the store are so cheap looking. I wanted a cool one. This year I finally have one, and I am so excited about it. About an hour’s worth of work, and this DIY scarecrow will last for years and years.
This post may contain affiliate links.
Supplies Needed
- 2 2×4 pieces of wood
- Saw
- Wood or deck screws
- Drill
- Foam pumpkin for head
- Clothing
I spent a total of about $20 on this scarecrow. You may be able to spend less if you have some of the clothing on hand. I got the 2×4’s at Lowes, all the clothing, the hat, and the pumpkin at Goodwill.

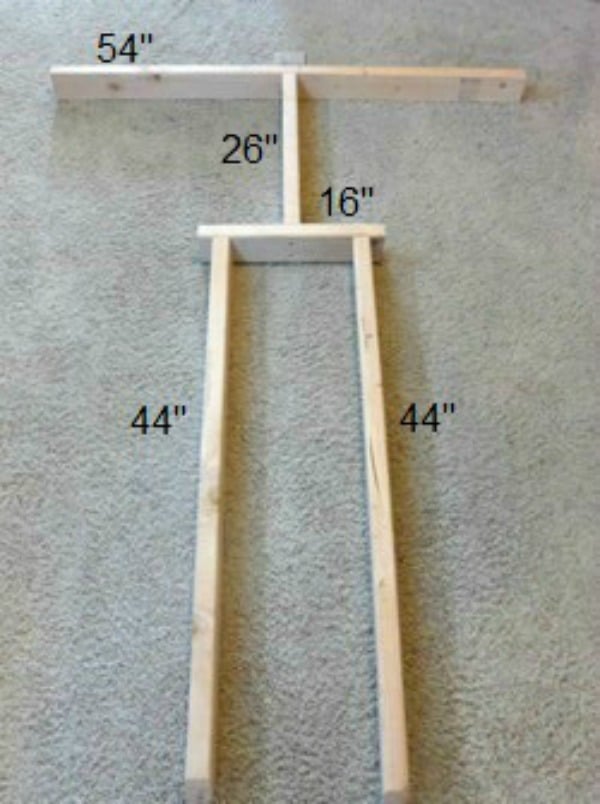
To make this scarecrow, you will have to use a saw to cut the 2×4’s to the desired lengths. You will need 1 54-inch piece, 1 26-inch piece, 1 16-inch piece, and 2 44-inch pieces. Please refer to the diagram below to see how the pieces are assembled.
Scarecrow Directions
You might want to cut the ends of the leg pieces so that they are more pointed instead of square, so you can put them into the ground more easily.
My husband pre-drilled all the holes, and then used deck screws to screw all the pieces together as shown in the diagram.
Related Article: 7 Creative Fall Decor Ideas for Transforming Your Home into a Cozy Haven

He also screwed a small approximately 4-inch by 4-inch piece of wood to the top of the frame for the head to set on.
After you have the pieces screwed together, you can dress the scarecrow. I couldn’t find any overalls, so we chose to use jeans with a pair of suspenders.
Make sure the pants you have chosen will fit over the hip piece of the frame. You can also cut the frame to fit your clothing, as necessary.
The pumpkin head can be screwed to the top of the frame. The hat isn’t necessary, but adds a nice touch. You can stuff straw in the ends of the sleeves and pant legs, but it isn’t necessary.
I absolutely love my new scarecrow, and appreciate my husband for making it for me. The frame is very sturdy and we can use it again and again, either with the same clothing or different clothing next year.
We are working on a wife for our male scarecrow, but haven’t quite figured out how to do her hair yet…my husband suggested a mop for hair…we’ll see.
Like this article? You might also like 10 DIY Fall Wreaths to Make for Your Front Door and How to Preserve Cattails for Fall Home Decor
Related Articles
- How to Make Waxed Fall Leaves
- Fall Leaf Placemats
- Fall Leaf Mason Jar Candle Holders
- Best Pumpkin Patches in Washington State
- Pumpkin Pie Play Dough
- Easy Pumpkin Centerpiece
Follow my fall or Halloween boards on Pinterest.

In case you missed it:


Thank you for this! Great design!
Hi there
I love your adorable scarecrow project. Thank you for contributing it to my roundup post that includes lots of great DIY Halloween decorating projects like yours. I’m sure my readers will appreciate your tutorial. Much appreciation.