This post may contain affiliate links.
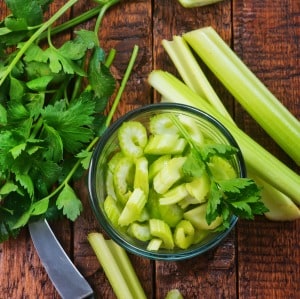
Have you ever wondered what to do with the leftover celery scraps after cooking? Instead of throwing them away, you can grow celery from scraps and have a fresh supply of this nutritious vegetable at your fingertips. Growing celery from scraps is an easy and fun project that you can do with your family, and it’s a great way to reduce food waste.
Understanding Celery
If you’re thinking of growing celery from scraps, it’s important to understand the vegetable and its properties first. Celery is a vegetable that belongs to the same family as carrots, parsley, and fennel. It’s commonly used as a flavoring agent in soups, stews, and salads, and it’s also a popular snack.
Want to try making your own jelly at home?
Get my free guide with 8 easy, beginner-friendly jelly recipes you can confidently make.
Celery is an herbaceous plant that can grow up to three feet tall. It has long, fibrous stalks that are light green in color and have a crunchy texture. The leaves are dark green and have a slightly bitter taste. Celery is a biennial plant, which means that it completes its life cycle in two years.
Related Article: How to Re-Grow Green Onions
There are two main types of celery: self-blanching and green. Self-blanching celery is easier to grow and has a milder flavor than green celery. Green celery is more flavorful and has a stronger aroma.

Celery is a cool-season crop and it’s best to plant it in the spring or fall. It prefers well-draining soil that is rich in organic matter. Celery requires consistent watering and should be fertilized regularly.
In terms of nutrition, celery is low in calories and high in fiber. It’s also a good source of vitamin K, folate, and potassium. Celery is known for its anti-inflammatory properties and may help lower blood pressure.
Why Grow Celery From Scraps
If you’re looking for a way to save money and have a fresh supply of vegetables, then growing celery from scraps is a great option. Not only is it an easy process, but it’s also a fun way to get started with gardening and exercise your green thumb.
By re-growing celery from kitchen scraps, you are reducing waste and making the most of the food you have. It’s also a great way to get fresh vegetables without having to go to the store. You can grow celery right in your garden or even in a pot on your windowsill.
Celery is a vegetable that is commonly used in cooking, and it’s also packed with nutrients. It’s an excellent source of fiber, vitamin K, and potassium. By growing your own celery, you can ensure that you’re getting fresh and organic produce, free from pesticides and chemicals.
Related Article: Tips for Growing Garlic
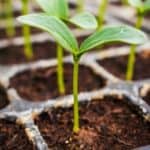
Growing celery from scraps is not only limited to celery. You can also regrow other vegetables and herbs from kitchen scraps, such as green onions, lettuce, and basil. It’s a great way to get fresh greens and herbs without having to buy them from the store.
By re-growing celery from scraps, you can also get new plants for free. It’s a great way to expand your garden without having to spend any money. Plus, it’s a fun and rewarding experience to watch your plants grow and thrive.

Starting Your Celery Plant
Growing celery from scraps is a simple and rewarding process that anyone can do. With just a few materials and some patience, you can have fresh celery sprouts in a matter of days. Here are the steps to get started:
Materials
To start growing celery from scraps, you will need:
- Celery scraps or base
- A shallow dish or bowl
- Toothpicks (optional)
- Water
- Warm water
- A container
- A windowsill with natural light
Steps
- Cut off the bottom 2 inches of your celery stalks and save them for growing. You can use the rest of the celery in your recipes.
- Place the celery base in a shallow dish or bowl of warm water. Make sure the water covers the bottom inch of the base.
- If you want, you can insert toothpicks into the sides of the celery base to hold it up and keep it from submerging completely in the water.
- Place the container on a windowsill that gets good natural light. A minimum of five hours a day of light is ideal.
- Change the water every two days to keep it fresh and oxygenated.
- Small leaves should emerge within a few days, and then small stalks and roots should follow within a week.
- Once your celery has sprouted, you can transplant it into soil or continue to grow it in water.
Transitioning to Soil
Once your celery has grown roots and new leaves, it’s time to transition it to soil. You can either plant it directly in your garden or transfer it to a pot.
If you choose to use a pot, make sure it has drainage holes to prevent water from accumulating and causing root rot. Fill the pot with a good quality potting soil that is rich in nutrients and has good drainage.
Before planting your celery, make a hole in the center of the soil that is deep enough to accommodate the roots. Gently remove the celery from the water and place it in the hole, making sure the roots are covered with soil.
Water your celery immediately after planting and keep the soil moist but not waterlogged. As your celery grows, you may need to add more soil to the pot to keep the roots covered.
If you choose to plant your celery directly in your garden, make sure the soil is well-draining and fertile. Dig a hole that is deep enough to accommodate the roots and gently place the celery in the hole. Cover the roots with soil and water immediately after planting.
Whether you plant your celery in a pot or in your garden, make sure it gets plenty of sunlight and water regularly. With proper care, your celery will continue to grow and thrive.
Growing Conditions for Celery
To grow celery successfully from scraps, you need to provide the right growing conditions. Here are some factors to consider:
Sunlight
Celery needs plenty of sunlight to grow. Ideally, it should receive at least 6 hours of direct sunlight per day. If you’re growing celery indoors, make sure it’s near a south-facing window or use grow lights to provide the necessary light.
Related Article: Growing Bean Sprouts in a Jar
Soil
Celery prefers a soil pH between 6.0 and 7.0. You can test the pH of your soil using a soil test kit. If your soil is too acidic, you can add lime to raise the pH. If it’s too alkaline, you can add sulfur to lower the pH.
Water
Celery needs consistent moisture to grow properly. Make sure the soil is always moist, but not waterlogged. Water the plants deeply once or twice a week, depending on the weather and the soil type.
Temperature
Celery is a cool-season crop that prefers temperatures between 60 and 70 degrees Fahrenheit. If the temperature gets too hot, the plants may bolt and become bitter. If it gets too cold, the plants may stop growing or even die.
Nutrients
Celery is a heavy feeder and requires a lot of nutrients to grow properly. Before planting, amend the soil with compost or well-rotted manure to provide the necessary nutrients. You can also fertilize the plants every 2-3 weeks with a balanced fertilizer.
Shade
While celery needs plenty of sunlight, it also benefits from some shade during the hottest part of the day. If you’re growing celery in a hot climate, consider providing some shade during the afternoon to prevent the plants from wilting.
Harvesting Your Celery
Once your celery has grown to a desirable size, it’s time to harvest it. The ideal time to harvest your celery is when the stalks are around 8-10 inches tall and have a diameter of at least 1 inch. This usually takes around 4-5 months after planting.
When harvesting your celery, it’s important to use a sharp knife to cut the stalks at the base. Make sure to cut the stalks cleanly and avoid damaging the green leaves, as they contribute to the plant’s growth and vitality.
If you prefer to harvest only a few stalks at a time, you can cut the outer stalks first and allow the inner stalks to continue growing. This will help ensure a steady supply of fresh celery throughout the growing season.
After harvesting your celery, you can store it in the refrigerator for up to two weeks. If you have more celery than you can use, you can also freeze it for later use in soups, stews, and other recipes.
Growing Other Vegetables From Scraps
Growing vegetables from scraps is an easy and cost-effective way to reduce waste and produce your own fresh produce. Here are some other vegetables you can grow from scraps:
- Onions: Onions can be regrown by planting the bottom of the onion in soil. Make sure to leave the top of the onion exposed and water regularly.
- Sweet Potato: Cut a sweet potato in half and suspend it over a jar of water using toothpicks. The bottom of the sweet potato should be submerged in the water. After a few weeks, you should see roots and sprouts forming. Once the sprouts are a few inches long, you can plant the sweet potato in soil.
- Lettuce: Save the bottom of a head of lettuce and place it in a shallow dish of water. Change the water every few days and keep the dish in a sunny spot. After a few days, you should see new leaves growing from the center of the lettuce.
- Garlic: Separate a garlic bulb into individual cloves and plant each clove in soil with the pointed end facing up. Make sure to plant the cloves about an inch deep and water regularly.
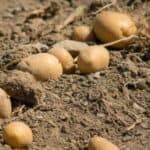
- Potatoes: Cut a potato into pieces that each contain at least one “eye” and let them dry for a day or two. Plant the pieces in soil with the eyes facing up and cover with a few inches of soil. Water regularly and wait for the potato plants to grow.
- Mint and Cilantro: Place a stem of mint or cilantro in a jar of water and place it in a sunny spot. Change the water every few days and wait for roots to form. Once the roots are a few inches long, you can plant the stem in soil.
- Green Onions: Save the bottom of a bunch of green onions and place them in a jar of water. Change the water every few days and keep the jar in a sunny spot. After a few days, you should see new green onion shoots growing from the bulbs.
- Fruit: Many fruits can be regrown from their seeds, including avocado and tomatoes. Simply save the seeds and plant them in soil.
- Bok Choy: Place the bottom of a head of bok choy in a shallow dish of water and keep it in a sunny spot. After a few days, you should see new leaves growing from the center of the bok choy.
- Beets, Leeks, Cabbages, Turnips, and Fennel: These vegetables can be regrown by planting the bottom of the vegetable in soil. Make sure to leave the top of the vegetable exposed and water regularly.
- Scallions: Save the bottom of a bunch of scallions and place them in a jar of water. Change the water every few days and keep the jar in a sunny spot. After a few days, you should see new scallion shoots growing from the bulbs.
- Pumpkin Seeds: Roast pumpkin seeds and save them to plant in soil. Make sure to plant the seeds about an inch deep and water regularly.
- Rosemary: Cut a stem of rosemary and remove the leaves from the bottom few inches. Place the stem in a jar of water and keep it in a sunny spot. After a few days, you should see roots forming. Once the roots are a few inches long, you can plant the stem in soil.
By regrowing vegetables from scraps, you can save money and reduce waste while enjoying fresh produce from your own garden.
Common Challenges and Solutions
Growing celery from scraps is an easy and rewarding experience, but it can also come with some common challenges. Here are some of the most common issues you may encounter and some solutions to help you overcome them.
Challenge: Slow Sprouting
If you find that your celery scraps are taking a long time to sprout, don’t worry. Celery can be a slow grower, especially if the conditions aren’t right. To speed up the process, try placing your celery in a warm and bright spot, like a windowsill or under a grow light. You can also try covering the celery with a plastic bag to create a mini greenhouse effect and trap in moisture.
Challenge: Indoor Growing
If you’re growing celery indoors, you may find that your plant isn’t getting enough light. Celery needs at least 6 hours of direct sunlight each day, so make sure you place it near a sunny window or invest in a grow light. You can also rotate your plant every few days to ensure that all sides get equal exposure to light.
Challenge: Frosts
If you’re growing celery outside, you may encounter frosts that can damage or kill your plant. To protect your celery, cover it with a blanket or tarp when frost is expected. You can also try planting your celery in a raised bed or container, which will help insulate the roots from the cold.
Challenge: Pests
Pests like aphids and slugs can be a common problem when growing celery. To prevent pests, make sure you keep your plant healthy and well-watered. You can also try spraying your celery with a mixture of water and dish soap, which can help deter pests. If you do find pests on your plant, remove them by hand or use an organic pesticide.
Challenge: Transplanting
If you’re transplanting your celery from indoors to outdoors, or from one pot to another, you may find that your plant goes into shock. To minimize shock, make sure you water your plant well before and after transplanting. You can also try adding a layer of compost or fertilizer to the new soil to give your plant a boost of nutrients.
Remember, growing celery from scraps is a fun and rewarding experience, but it can also come with some challenges. By following these tips and solutions, you can ensure that your celery plant thrives and produces delicious, crisp stalks.
Frequently Asked Questions
How long does it take to grow celery from scraps?
It usually takes around 2-3 weeks to see new growth from your celery scraps. However, it may take longer depending on the growing conditions. Be patient and keep the scraps moist and in a sunny spot.
Can you regrow celery from store bought celery?
Yes, you can regrow celery from store-bought celery. Just cut off the bottom of the celery stalk, leaving about an inch or two of the base. Place the base in a shallow dish of water, making sure the water covers the bottom of the base. Change the water every few days and wait for new growth to appear.
How many times can you regrow celery?
You can regrow celery from scraps multiple times, but the quality of the celery may decrease with each regrowth. It’s best to start with fresh scraps each time for the best results.
How to grow celery from stalk in water?
To grow celery from a stalk in water, cut off the bottom of the celery stalk and place it in a shallow dish of water. Make sure the water covers the bottom of the stalk. Change the water every few days and wait for new growth to appear. Once the celery has grown new roots, you can transplant it into soil.
How to grow celery in pots?
To grow celery in pots, choose a pot that is at least 12 inches deep and wide. Fill the pot with a mixture of potting soil and compost. Plant the celery seedlings or scraps about 10 inches apart. Keep the soil moist and in a sunny spot. Celery prefers cooler temperatures, so keep the pot in a shaded area during hot weather.
How to grow celery from seed?
To grow celery from seed, start the seeds indoors 8-10 weeks before the last frost date in your area. Plant the seeds in a seed-starting mix and keep the soil moist. Once the seedlings have grown to about 2 inches tall, transplant them into individual pots or into a garden bed. Keep the soil moist and in a sunny spot. Harvest the celery when the stalks are about 8-10 inches tall.
Follow my gardening board on Pinterest.