This post may contain affiliate links.
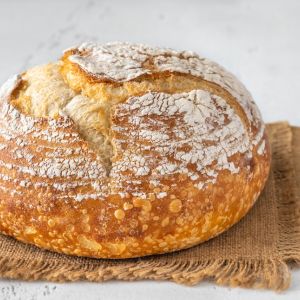
If you’re new to baking bread, sourdough bread might seem intimidating. However, with a little bit of practice and patience, you can easily make delicious sourdough bread at home with this easy sourdough bread for beginners.
Sourdough bread is a type of bread that is made without using commercial yeast. Instead, it is made using a sourdough starter, which is a mixture of flour and water that has been fermented by naturally occurring yeast and bacteria.
Related Recipe: Easy Fudgy Sourdough Brownies: A Delightful Treat for Chocolate Lovers
One of the benefits of making sourdough bread is that it is healthier than bread made with commercial yeast. The fermentation process that occurs when making sourdough bread breaks down the gluten in the flour, making it easier to digest.
Additionally, sourdough bread has a lower glycemic index than bread made with commercial yeast, which means that it causes a slower rise in blood sugar levels. Sourdough bread also has a unique tangy flavor that is hard to replicate with commercial yeast.
Want to try making your own jelly at home?
Get my free guide with 8 easy, beginner-friendly jelly recipes you can confidently make.
Related Article: Sourdough Discard Pancakes
Getting Started with Sourdough
If you’re new to sourdough bread baking, you might find the process a bit intimidating. But fear not! With a little bit of knowledge and practice, you can master the art of making delicious sourdough bread at home. Here are a few things to keep in mind as you get started.
Understanding Sourdough and Its Components
Sourdough bread is made using a sourdough starter, which is a mixture of flour and water that has been allowed to ferment for several days.
During the fermentation process, wild yeasts and bacteria in the air and on the flour consume the carbohydrates in the mixture and produce carbon dioxide gas and lactic acid. This creates the characteristic tangy flavor and chewy texture of sourdough bread.
To make sourdough bread, you’ll need to use a sourdough starter in place of commercial yeast. This means that you’ll need to plan ahead and allow time for the starter to ferment before you can bake your bread. But don’t worry, once you get the hang of it, it will become second nature.
Related Recipe: Easy Sourdough Biscuit Recipe for Beginners
Related Article: Sourdough Discard Coffeecake
The Importance of Sourdough Starter
The sourdough starter is the heart of your sourdough bread. It’s what gives the bread its unique flavor and texture. It’s also what makes sourdough bread healthier than other types of bread.
The fermentation process breaks down the gluten in the flour, making it easier to digest. It also increases the bioavailability of nutrients in the flour, making them easier for your body to absorb.
To make your own sourdough starter, all you need is flour, water, and a little bit of patience. There are many different methods for making sourdough starter, but the basic idea is to mix equal parts flour and water and let it sit at room temperature for several days, stirring occasionally.
As the mixture ferments, it will become bubbly and sour-smelling. Once your starter is ready, you can use it to make delicious sourdough bread.
Creating Your Sourdough Starter
Making your own sourdough starter is easy and rewarding. All you need is flour, water, and patience. Here is a step-by-step guide to creating your own sourdough starter.
Feeding and Maintaining Your Starter
Once you have mixed your flour and water together, you will need to feed your starter regularly. This means adding more flour and water to your starter to keep it alive and healthy.
To feed your starter, you will need to discard about half of it and then add fresh flour and water. The amount of flour and water you add will depend on the size of your starter. A good rule of thumb is to add equal parts flour and water by weight.
It’s important to keep your starter at room temperature and cover it loosely with a lid or cloth. This will allow the wild yeast and bacteria to thrive and ferment your starter.
Knowing When Your Starter Is Ready
Your starter will be ready to use when it is active and bubbly. This means that the wild yeast and bacteria have multiplied and are producing gas, which will cause your starter to rise.
To test if your starter is ready, you can perform a float test. Take a small amount of your starter and drop it into a bowl of water. If it floats, your starter is ready to use.
Remember, creating a sourdough starter takes time and patience. It may take a few days or even a week for your starter to become active. But once it is ready, you will be able to use it to make delicious sourdough bread.
Shaping and Proofing
Once you have mixed your dough and allowed it to ferment, it’s time to shape and proof your sourdough bread. This step is crucial in creating a beautiful and delicious loaf. Here are some tips to help you shape and proof your dough like a pro.
Related Article: Sourdough Discard Pancakes
Creating Tension on the Work Surface
When shaping your dough, it’s important to create tension on the work surface. This will help your dough maintain its shape during the final proofing stage. To create tension, follow these steps:
- Flour your work surface lightly and place your dough on it.
- Fold the dough in half and press down gently to seal the edges.
- Rotate the dough 90 degrees and repeat the folding and pressing process.
- Repeat this process several times until the dough feels taut and smooth.
Using a Proofing Basket Effectively
A proofing basket, also known as a banneton, is a great tool for shaping and proofing your dough. Here are some tips for using a proofing basket effectively:
- Lightly flour the inside of the basket to prevent the dough from sticking.
- Gently shape your dough into a round or oval shape and place it in the basket.
- Cover the dough with a damp cloth and let it proof for the recommended time.
- When ready to bake, carefully turn the basket over onto your baking sheet or Dutch oven. The dough should release easily.
Remember to weigh your dough and use the appropriate size proofing basket to ensure that your dough proofs evenly. Additionally, proper proofing is essential for developing gluten and creating a soft and airy center in your bread.
Sourdough Bread Recipe for Beginners
Ingredients:
- 1 cup active sourdough starter
- 1 1/2 cups lukewarm water
- 4 cups bread flour
- 1 1/2 teaspoons salt
Instructions:
- In a large mixing bowl, combine the sourdough starter and lukewarm water.
- Gradually add the bread flour to the bowl, stirring until a shaggy dough forms.
- Sprinkle the salt over the dough and continue to mix until well incorporated.
- Cover the bowl with a clean kitchen towel and let the dough rest at room temperature for 30 minutes.
- After the resting period, perform a series of stretch-and-folds on the dough. To do this, grab one side of the dough, stretch it upwards, and then fold it over the rest of the dough. Rotate the bowl and repeat this process for a total of 4 folds, spaced 30 minutes apart.
- Once the stretch-and-fold process is complete, cover the bowl or place the dough in a proofing basket and allow the dough to rise at room temperature for 4-6 hours, or until it has visibly expanded and become puffy.
- Preheat your oven to 450°F (230°C) and place a Dutch oven or a baking dish with a lid inside to preheat as well.
- Carefully transfer the risen dough to a piece of parchment paper, shape it into a round loaf, and score the top with a sharp knife.
- Carefully place the dough into the preheated Dutch oven or baking dish, cover with the lid, and bake for 20 minutes.
- Remove the lid and continue baking for an additional 25-30 minutes, or until the bread is golden brown and sounds hollow when tapped on the bottom.
- Allow the sourdough bread to cool on a wire rack before slicing and enjoying!
Caring for Your Sourdough Bread
Congratulations on making your own sourdough bread! Now that you’ve put in the effort to make it, you want to make sure it stays fresh and delicious for as long as possible. Here are some tips for caring for your sourdough bread.
Cooling and Storing Your Bread
After your bread has finished baking, let it cool completely on a wire rack before storing it. This will prevent condensation from forming inside the storage container, which can make the bread soggy and moldy.
When storing your sourdough bread, the best option is to keep it in a bread box or a paper bag. This will allow the bread to breathe and prevent it from getting too moist. Avoid storing your bread in plastic bags, as this can trap moisture and cause mold to grow.
If you need to store your bread for more than a few days, you can also freeze it. Wrap the bread tightly in plastic wrap or aluminum foil, then place it in a freezer-safe container. When you’re ready to eat it, let it thaw at room temperature for a few hours before slicing.
Slicing and Serving Tips
To get the most flavor and texture out of your sourdough bread, it’s important to slice it properly. Use a sharp serrated knife to slice the bread, and cut it into thick slices to preserve the crust. If you’re serving the bread with a meal, you can also tear it into chunks for a rustic look.
When serving your bread, consider toasting it or using it to make sandwiches or crostini. Sourdough bread has a tangy flavor that pairs well with a variety of toppings, from butter and jam to cheese and cured meats.
Troubleshooting and Tips
Making sourdough bread can be a bit tricky, but with some practice and patience, you’ll soon be baking delicious loaves. Here are some troubleshooting tips to help you along the way:
Hydration
One of the most common mistakes when making sourdough bread is not getting the hydration right. If your dough is too dry, it won’t rise properly, and your bread will be dense.
On the other hand, if your dough is too wet, it will be difficult to shape and may spread out too much during baking. Aim for a hydration level of around 75%, but adjust as needed based on the type of flour you’re using.
Oven Spring
Oven spring refers to the final rise your bread gets in the oven. If your bread isn’t getting enough oven spring, it may be because your oven isn’t hot enough.
Preheat your oven for at least 30 minutes before baking to ensure that it’s at the right temperature. You can also try using a Dutch oven or other covered baking vessel to help trap steam and create a better rise.
Fermentation Process
The fermentation process is what gives sourdough bread its unique flavor and texture. If you’re not getting the results you want, try adjusting the temperature and timing of your fermentation.
A cooler temperature will slow down the process and result in a more sour flavor, while a warmer temperature will speed it up and result in a milder flavor.
Natural Fermentation
Sourdough bread relies on natural fermentation rather than commercial yeast. This means that the process can be a bit unpredictable, but it also means that your bread will have a more complex flavor profile. Don’t be afraid to experiment with different flours, hydration levels, and fermentation times to find what works best for you.
Frequently Asked Questions
How do I create my first sourdough starter?
Creating a sourdough starter is easy and requires only two ingredients: flour and water. Mix equal parts of flour and water in a jar, and let it sit at room temperature for a few days. As the mixture ferments, it will begin to bubble and develop a sour smell.
This means your starter is alive and ready to use! Keep feeding it with equal parts flour and water every day, and discard half of the mixture before each feeding to maintain its health.
What are the essential ingredients for making sourdough bread?
Sourdough bread requires only four ingredients: flour, water, salt, and your sourdough starter. The type of flour you use will affect the flavor and texture of your bread, so choose a high-quality flour that suits your taste. You can also add other ingredients like seeds, nuts, or dried fruits to add flavor and texture.
Can I make sourdough bread without a starter, and how?
No, you cannot make sourdough bread without a starter. Sourdough bread gets its unique flavor and texture from the natural yeast and bacteria in the starter. However, you can create a starter from scratch by following the instructions in the first FAQ.
What’s the best recipe for a beginner to bake sourdough bread?
There are many great sourdough bread recipes for beginners, but the most important thing is to find a recipe that suits your skill level and taste.
Look for recipes with clear instructions and simple ingredients, and don’t be afraid to experiment and make mistakes. A good place to start is with a basic sourdough boule recipe.
What are the health benefits of sourdough bread compared to regular bread?
Sourdough bread is often considered healthier than regular bread because it is easier to digest and has a lower glycemic index.
The long fermentation process in sourdough bread breaks down the gluten and other complex carbohydrates, making it easier for your body to absorb nutrients. Sourdough bread also has a unique flavor and texture that many people find more satisfying than regular bread.
What are some common mistakes to avoid when baking sourdough bread for the first time?
Some common mistakes to avoid when baking sourdough bread include over-kneading the dough, not letting the dough rest enough, not using a baking vessel, and not scoring the bread before baking. Be patient and follow the recipe carefully, and don’t be afraid to make mistakes and learn from them.
Follow my sourdough recipes board on Pinterest.