
This post may contain affiliate links.
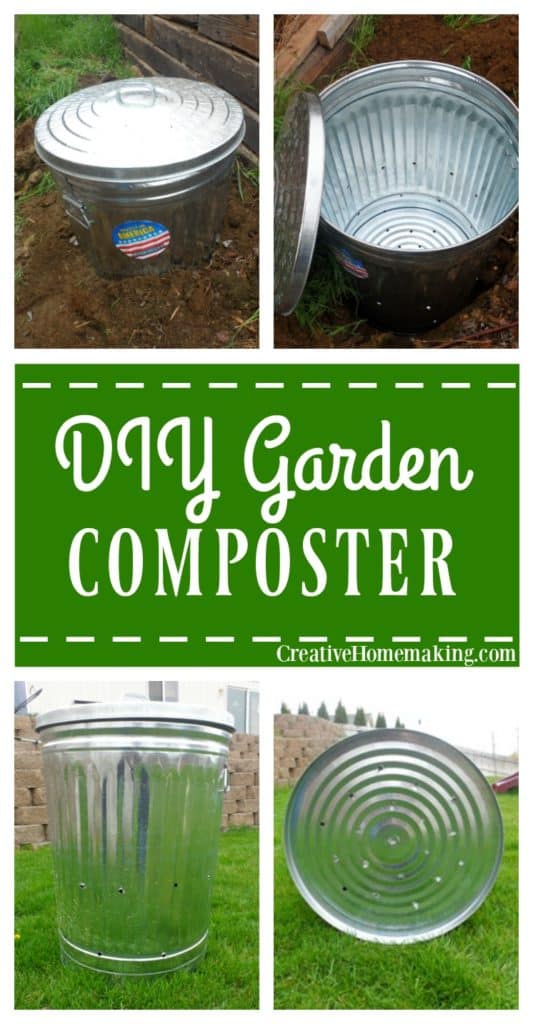
If you live in the city and have a small backyard garden, you can still have a compost pile. There are a lot of different containers you can purchase to store your compost in, but I found this great idea for making your own DIY backyard composter from a metal garbage can.
I saw this idea on the Vegetable Gardener web site. You can purchase what you need at the local hardware store and put this compost container together in less than an hour.
DIY Backyard Composter
Want to try making your own jelly at home?
Get my free guide with 8 easy, beginner-friendly jelly recipes you can confidently make.
You will need:
- Galvanized metal trash can
- Drill with 1/4 or 1/2″ drill bit
- Shovel
I bought my metal trash can at Lowe’s. The one I purchased was 31 gallons. You want metal instead of plastic because these galvanized metal cans are rodent proof, odor proof, and rust proof.
That is one of the benefits of using the can over just having a pile laying in the yard. You want to keep pets and rodents away from your compost area. This container with the lid solves that problem.
Related Article: How to Make Compost Tea: A Quick and Easy Guide
Next you want to drill some holes in your can. 1/4 or 1/2 inch is fine. The holes are so that moisture can drain out, and so that earthworms can get in and help decompose the organic matter in the can.
Drill about 20 holes in the bottom of the can, and about 20 holes around the sides of the can. You only need to drill holes in the bottom third of the can. This is the portion of the can that will be in the ground.
Next dig a hole that is about half as deep as the can. Set the can into the ground and pat soil down around the sides.
About half of the can should be above ground (see photo). Your can is now ready for your kitchen scraps.
Using Your DIY Composter
Add your kitchen scraps a couple of times a week. After you add the food scraps, add a thin layer of dirt.
If your compost gets too wet or starts to smell, you can add some “brown matter” such as grass clippings, shredded paper, saw dust, or straw.
Depending on how many scraps you are adding to the composter, it will take 2-4 months to fill it. To use the compost, dig the decomposed organic matter from the bottom of the can by pushing the compost to the side and digging out the compost on the bottom.
Return the top layer to the can. It will take a minimum of 90 days for the entire container to be composted.
Your compost is ready to add to the garden when it is rich and dark and looks like dirt. You shouldn’t be able to identify any food products in it.
A compost pile you start in the spring will be ready for your fall garden, and a compost pile you start in fall will be ready for your spring garden.
If you have a large garden and need a lot of compost, you can use more than one composter.
As one fills up move on to the next one, then you have more than one composter you can rotate. The contents will be done at different times, ensuring compost year round.
I’m new to composting. I have a large garden planned for this year. I am very excited to try out my new composter and will keep you updated on how it goes.
Do add:
- Vegetable scraps
- Grains and pastas
- Fruit rinds and peels
- Breads
- Coffee grounds
- Tea bags
- Egg shells
- Paper napkins
Don’t add:
- Meat
- Fish and poultry
- Cheese
- Oils
- Butter
- Other animal products
Related Articles
- 5 Best Kitchen Compost Bins
- 6 DIY All Natural Garden Fertilizers
- 5 Best Kitchen Trash Cans 2019
- 5 DIY Bug Sprays for the Garden
- Using Epsom Salt as a Natural Fertilizer in the Garden


Hey there! I’ve seen this idea around the web and like your simple instructions the best. I realize that this is an older article so I wonder how this worked out for you? My only concern is trying to turn the compost and then get it out of the can when it’s ready. I’m in my 50s so trying to get/dig compost out of a hole (albeit a very nice galvanized hole) sounds back breaking lol! Please share your experience, and much thanks!
I’m really curious as to whether you ended up seeing any worms in your bin! I also really like the use of metal as it doesn’t leach nasty plastic chemicals into your compost.