A couple of months ago I saw this photo of chive blossom vinegar and I couldn’t wait for my chives to start blossoming so I could try making this flavored vinegar for myself.
This post may contain affiliate links.
This is an infused vinegar, where you just let herbs set in vinegar for several weeks to let the flavor of the herbs infuse into the vinegar.
There are several different methods of infusing vinegar. The easiest method is to just pour the vinegar over the chive blossoms and let them set for a couple of weeks.
Related Article: Lemon Vinaigrette Dressing Recipe: Tangy and Refreshing
There is also a heat method that I haven’t tried. You can learn more about that method on the Preparedness Mama web site. With the heat method you heat the vinegar to 190-195 degrees F before adding the herbs.
Heating the vinegar first is supposed to speed up the infusing process so that the vinegar does not have to set for so long. I’ll give that method a try another time.
Chive Blossom Vinegar Recipe
- Chive blossoms
- White vinegar
- Pint or quart sized canning jar
- Cheesecloth
Harvesting Instructions
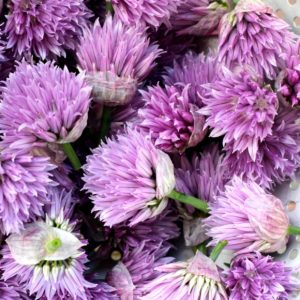
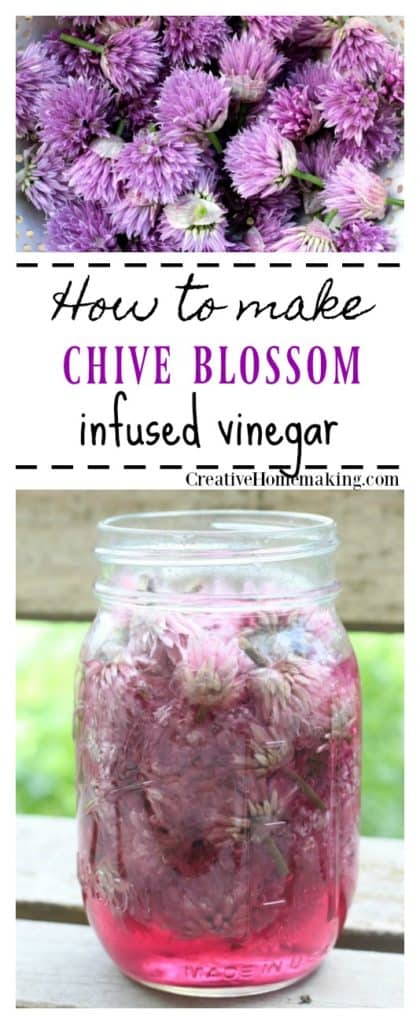
To get started you’ll need to pick a bunch of fresh chive blossoms. You can just take the blossoms and leave the rest of the chives to harvest later.
I collected my chive blossoms in a colander like this one and then gave them a good rinse to remove any dirt or insects that might be hiding in the blossoms.
Preparation
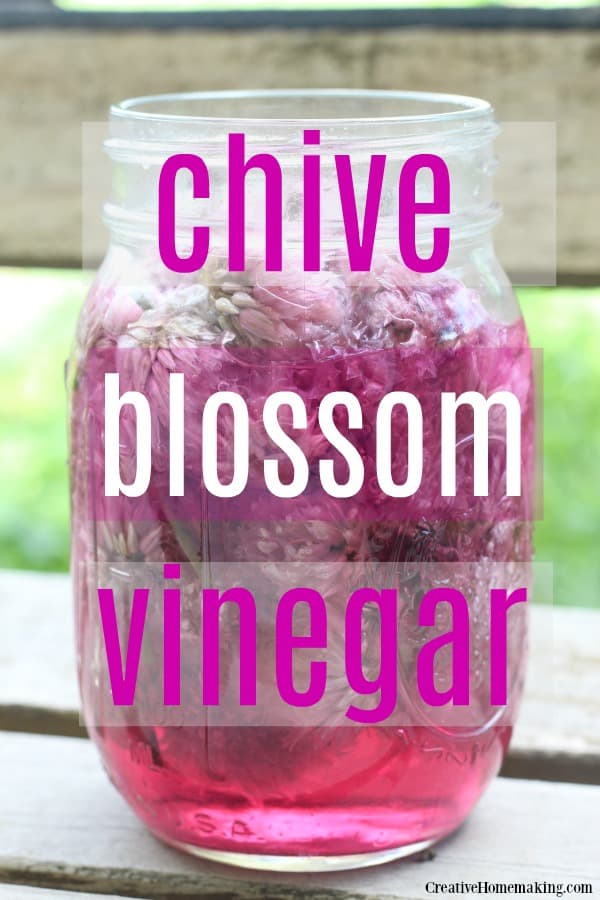
Place the clean blossoms in a glass jar, mason jars work great for this. Pack as many blossoms as you can fit into the jar.
Pour white vinegar over the chive blossoms, filling to the top of the jar. Press the blossoms down into the jar, adding more if you can get more to fit.
Next you are just going to let the jar set out for a week or two so that the flavor of blossoms infuses into the vinegar.
You are going to want to cover the jar so that it doesn’t attract fruit flies. Vinegar is actually what you use to trap and kill fruit flies!
When you cover your jar, don’t use a metal canning ring, the metal will react with the vinegar. You can either put cheesecloth on the jar and put a rubber band around it or Amazon has some inexpensive plastic canning jar lids that are great for storing foods in canning jars that you don’t actually want to seal.
After a week or so you will notice that your vinegar has turned a beautiful shade of pink or purple! Give it a taste to see if it has reached the desired flavor. If not, let it sit for a few more days or weeks.
When you are ready to remove the chive blossom flowers you might want to pour the vinegar through a fine mesh sieve to remove any residue of the chive flowers.
Your vinegar is now ready to use in your favorite salad dressings and marinades! I love the chive flavor of this infused vinegar, I will definitely be making it again next year.
This vinegar can be stored in or out of the refrigerator for several months. Vinegar has a long shelf life, it can be stored in your pantry cupboard for months without refrigeration.
Related Recipes
- How to Freeze Herbs in Butter or Olive Oil
- Raspberry Vinegar and Vinaigrette
- Blueberry Vinegar and Vinaigrette


In case you missed it:
I didn’t get to my chives as they were blooming so some of mine aren’t the freshest. They are still purple but not as bright as the fresh. Can I still use them?
Have you ever made this in a French Press? Just wondering, then you wouldn’t have to filter out the infused blossoms.
What in the word would you use this vinegar for when it’s finished? My curiosity is kill ing me!
I’d use this vinegar to make an easy vinegar and oil salad dressing 🙂
my chives are just beginning to flower. what a great way to use them. i can’t wait to try this. thank you
You’re welcome! This was a really fun recipe, hope you like it as much as I did! 🙂